
ace of habits
Ever thought of a deck of cards as a calendar?
It takes approximately 2 months to form a habit. Taking the deck of cards as our guide (52 cards = 52 days), I created this visual calendar using Arduino to track new healthy habits I am trying to implement in my life.
Materials List:
-
Deck of cards
-
Acrylic sheet (18x24" and 3/16" thick)
-
Oak wood for frame
-
Perma Proto Breadboard
-
Standalone Momentary Capacitative Touch Sensor Breakout
-
Stranded Wire
-
Soldering Iron
-
Solder
-
Wire Cutter
-
Screws
-
Framing Nailer
-
Wood Glue
-
Tape
PROCESS:
Design Your Deck of Cards


Initial sketches which were then converted into vector graphics in illustrator.

For this project, I wanted to design my deck from scratch so I made my own illustrations to make my deck of cards. These illustrations will be laser cut and engraved to make the visual element of the habit tracker.
The size of each tile is 2.5 x 3" when laser cut. The size of the tiles is determined by the type of LED strip. In this case the size was based off of my LED strip which was 30 pixels/m.
Laser Cut and Engrave

[ I had a bit of a tough time getting access to a functional laser cutter for this project because I was determined to do it without having to spend a fortune by outsourcing it.
After multiple unsuccessful attempts at SVA and a hackerspace in Brooklyn, I finally managed to get access to one at my alma mater at the Parsons School of Design to get this done in time! ]
Engrave all illustrations and laser cut borders to fit exact measurements. (2.5 x 3")
Sourcing The Wood
I wanted to work with a good quality hardwood for this project but also wanted to save some money. Fortunately a good friend of mine worked at Eventscape in Long Island City and let me grab some of their oak scraps for my project! The hard part was getting the 8' tall beams from LIC to Chelsea in the subway by myself.

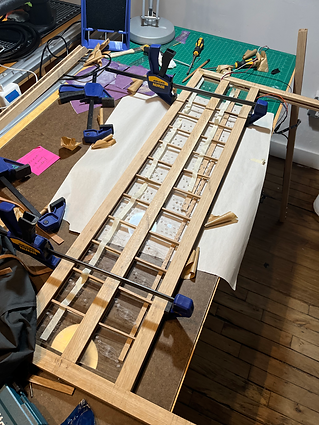
Construct Frame


Build frame according to measurements of LED strip.
In my case, it was 2 pixels per tile, 13 tiles a row, i.e 26 pixels a row and 4 rows
My woodshop did not have a working dado blade in good condition so I had to improvise and use a regular tablesaw blade to build my frame.
I had to make my rails by gradually incrementing the cuts/rips millimeter by millimeter to make it fit the LED strip snugly.
Each rail had a channel on the top and bottom to hold the tiles in.
[ Measure twice, cut once!
Lots of measuring and remeasuring and clean-up, but so fun! ]
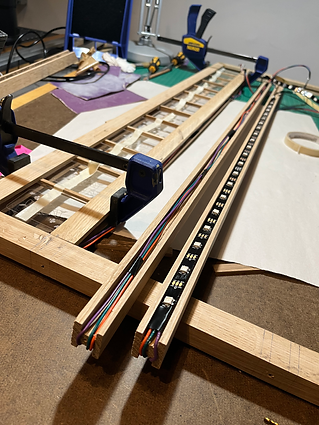
Solder Solder Solder!


Solder the LED strips together making sure that you have enough wire to wrap around the rails and reach the other side.
Cable management is key.
Code!

Test
Fix Code
Re-test
Re-solder
Assemble


[ When working with something with a million moving parts, make sure to have a friend or two to help you in the assembly to maintain sanity!
Thank you Ria! <3 ]
After ensuring that your code and parts all work together it's time to assemble it all.
I used V-nails and wood glue for the frame corners.
Drilled pilot holes for attaching the rails to the frame using screws.
Each card tile had a slim wood separator to ensure each piece stayed in its place and the light diffused correctly.
Construct Stand

I used a scrap of oak I had left over to make the stand for the habit tracker by simply making a channel for the frame to slide into.
Track Away!
Plug your habit tracker in and use it to cultivate good habits, right in time for the new year.
Don't just leave it up to chance.

[ Check out a video on how it works here! ]
The project was selected to be a featured post on Autodesk Instructables!!
